
DigitalHeat FX Support
You may notice that the FIRST thing that any of our tech support personnel will ask during any help session is:
“Have you taken your training course?”
The reason they do that is simple: 97% of questions are answered during the self-paced training course on Digital HeatFX and/or Print Optimizer – so the vast majority of issues with an end result are a process issue, not a product issue.
That’s why training is SO IMPORTANT
Calling tech support is not the best way to get trained on how to do something!
If you haven’t done your complete training course yet, please do that here. Once you have completed that, please fill in the request form on this page and we’ll answer as soon as possible.
How Support Works:
ColDesi has an advanced tech support ticketing system we use to make sure everyone gets the help they need as quickly as possible. When you complete the Ticket form it is put into the queue for the next available qualified technician. Because some days we get more support requests than others, and some problems take more time to solve than others, our response time varies.
TIP: Include a detailed description of the problem AND photos or videos if you can.
It’s VERY important to us that you get back up and running as quickly as possible, so you will hear from us as soon as possible.
So, visit our training site at www.training.coldesi.com, or the open a ticket link at the top of this page so you get back to making custom apparel!
Often we will want to print and press the same image as you are in order to help trouble shoot – This is the image we typicall use – Tiger Sample Image is available for download here: Tiger Image
NEW EZ PEEL INSTRUCTIONS!
These instructions supercede any links, times or temps described in the troubleshooting steps below.
If you’re having issues with the marry, peel or application steps lease choose the A+B image on the right or click here to check for the most current instructions. The recommended times, temperatures and pressures on EZ Paper vary over time so instruction are delivered in multiple ways including:
- Updated instructions in every new box of EZ Peel Paper you get
- QR codes on the top of the box indicating changes
- The Instructions link above.
Please check you’re following the correct steps before contacting support!

Troubleshooting Your Digital HeatFX System
There are 5 issues that we’ve identified are the most common, and are the most easily solvable, when using Laser EZPeel paper and the Digital HeatFX white toner printers.
In order to get you making shirts and making money successfully, we’ve distilled the troubleshooting for each of the common issues below. Just answer some yes or no questions, follow the video instructions and you should be back up and running in no time!
If for some reason the Troubleshooter steps don’t resolve your issue, you’ll still be prompted to complete a support request – already haven taken those first steps to a solution.
Digital HeatFX Troubleshooting
Problems during the marry peel
Problems during the transfer peel
Design colors don’t match what prints out
Color on garment
Saving Fails | Where to Save File or Not Saving
Programming Hotronix FusionIQ Presets
This video was originally recorded specifically for use with white toner printing systems, but the programming instructions are the same for any application.
Environmental Conditions and White Toner Printing
Transfer Finishing Sheet Options
Find pricing and availability here:
Support
Print Optimizer USB Dongle – Start Here:
Print Optimizer Dongle Install – 9541
At the end of this lesson, the learner will be able to:
- Insert the dongle into a USB port on their computer.
- Locate the zipped file on the ColDesi Support website.
- Download and extract the contents of the zipped folder to install the software.
- Navigate through the process of installing the software.
- Navigate through the process of setting up the software once it has been downloaded.
- Choose the 9541 printer under the Queue Manager menu.
Print Optimizer Dongle Install – 8432
At the end of this lesson, the learner will be able to:
- Insert the dongle into a USB port on their computer.
- Locate the zipped file on the ColDesi Support website.
- Download and extract the contents of the zipped folder to install the software.
- Navigate through the process of installing the software.
- Navigate through the process of setting up the software once it has been downloaded.
- Choose the 8432 printer under the Queue Manager menu.
Print Optimizer Keyless Dongle – Start Here:
Print Optimizer -8432 Keyless Installation
Print Optimizer -9541 Keyless Installation
Support:
Print Optimizer | Activate or Transfer Software
Working with SVG Files (Cutter Users)
If you are migrating files from using a Cricut or Silhouette or some other vinyl cutter you may run into issues when importing an SVG file into Print Optimizer.
The software you’re using for the cutter is often reading the OUTLINE as the vector and it doesn’t always save the color profile information when you save or export. That is why it is best to export them from a professional program like Adobe or Corel.
It is the difference between a cut file and a print file.
Print Optimizer | UniNet i550 Dots and Stripes
Print Optimizer Support | Dongle Replacement
Print Optimizer Support | Port Failed To Open
Print Optimizer Support | Print Oversized Graphics
Print Optimizer Support | Changing Queue Order
Print Optimizer Support | Partial Transparency
Print Optimizer Support | Change Substrate Color
Print Optimizer Support | Checking For Updates
Print Optimizer Support | Printing With Stripes
Print Optimizer Support | Don’t Use RGB Files
Print Optimizer Support | Super Size Image
Print Optimizer Support | Changing Underbase %
Print Optimizer Support | Saving and Restoring Files
Download or Open
Print Optimizer Support | Using Hot Folders
Download or Open
Print Optimizer Support | Viewing Raw Data
Download or Open
Print Optimizer Support | Removing the Safety Box
Download or Open
Print Optimizer Support | EZ Peel 1 Step Smearing
DigitalHeat FX UniNet Support
UniNet i550 Most Frequently Asked Questions
Here are the most common support videos our customers are searching for regarding the DigitalHeat FX i550 Bundle.
Please consult with support on any issue first!

Frequently Asked Questions
Print Optimizer | UniNet i550 Dots and Stripes
UniNet i550 Registration Wiper Troubleshooting
Customer Video: This video was created to solve a specific customer issue.
Registration Wiper from ColDesi Support on Vimeo.
UniNet i550 Removing the Transfer Belt
Customer Video: This video was created to solve a specific customer issue. DO NOT DO THIS UNLESS DIRECTED BY COLDESI SUPPORT!
UniNet i550 How to Remove Paper from Fuser
UniNet i550 Clearing the Paper Path
UniNet i550 Loading Paper Tray 1
UniNet i550 Cleaning the LED
Programming Hotronix FusionIQ Presets
This video was originally recorded specifically for use with white toner printing systems, but the programming instructions are the same for any application.
Environmental Conditions and White Toner Printing
UniNet i560 Most Frequently Asked Questions
Here are the most common support questions related to the DigitalHeat FX i560 Bundle.
Please consult with support on any issue first!

Frequently Asked Questions
i560 | How to Turn off Energy Saver
Energy Saver Mode 1 has been found to cause a periodic error during production “Internal Mis-Feed Error”.
Energy Saver Mode 1 : ON or OFF
Energy Saver Mode 2: Timer 1 – 60 Min
Energy Saver Mode 1.. is the mode that places the machine in Sleep Mode very quickly ( within a few minutes) were Energy Saver Mode 2 will allow you the set a Timer. The default settings look like this:
Energy Saver Mode 1 : ON
Energy Saver Mode 2: 60min
If you have that error or are directed by Support, use the instructions found on the pdf you can download below to turn OFF Energy Saver Mode 1. That way, the printer does not go into Sleep Mode and Energy Saver 2 timer kicks in. This will keep the print ON and already ready to load a sheet within a 60min window as compared to a few minutes.
Download PDF
DigitalHeat FX 8432 Support
OKI pro8432WT Most Frequently Asked Questions
Here are the most common support videos our customers are searching for regarding the DigitalHeat 8432 Bundle.
Please consult with support on any issue first!

Frequently Asked Questions
OKI pro8432WT Driver Installation
For OKI branded printers ONLY
OKI pro8432WT User Manual Download
Print Optimizer | Making a Print Mode for Hard Surface Paper
OKI pro8432WT Prepping Toners for Shipping
OKI pro8432WT Setting Shipping Mode
OKI pro8432WT Admin Password and Finding Serial Number
The Oki or Crio Printer’s Admin Password:
If your Serial Number of your machine starts with AL, then your Password would be either: 999999 or aaaaaa
If your Serial Number of your machine start with BX, then your Password would be the Serial Number of the machine.
Instructions:
- Ready to Print on the Display
- Press the DOWN Arrow to gain Access to the Functions
- Choose Option 1)CONFIGURATION > Press Enter
- Choose Option 5)SYSTEM > Press Enter
- Choose Option 1)SERIAL NUMBER > Press Enter.
This will give you the SN/ password for you 9541WT.. .. the letters will be Lower Case when entering the for the Password.
- Ready to Print on the Display
- Press the DOWN Arrow to gain Access to the Functions
- CONFIGURATION > Press Enter
- Scroll Down until you get to SYSTEM > Press Enter
- ( it will be on the 2nd CONFIGUATION page.. when nearing the last option press DOWN to access)
- SERIAL NUMBER > Press Enter.
This will give you the SN/ password for you 9541.. the letters will be Lower Case when entering the for the Password
Programming Hotronix FusionIQ Presets
This video was originally recorded specifically for use with white toner printing systems, but the programming instructions are the same for any application.
Environmental Conditions and White Toner Printing
Print Optimizer Dongle Install – 8432
At the end of this lesson, the learner will be able to:
- Insert the dongle into a USB port on their computer.
- Locate the zipped file on the ColDesi Support website.
- Download and extract the contents of the zipped folder to install the software.
- Navigate through the process of installing the software.
- Navigate through the process of setting up the software once it has been downloaded.
- Choose the 8432 printer under the Queue Manager menu.
Print Optimizer -8432 Keyless Installation
DigitalHeat FX 9541 Support
OKI pro9541WT Most Frequently Asked Questions
Here are the most common support videos our customers are searching for regarding the DigitalHeat FX 9541 Bundle.
Please consult with support on any issue first!

Frequently Asked Questions
OKI pro9541WT Admin Password and Finding Serial Number
The Oki or Crio Printer’s Admin Password:
If your Serial Number of your machine starts with AL, then your Password would be either: 999999 or aaaaaa
If your Serial Number of your machine start with BX, then your Password would be the Serial Number of the machine.
Instructions:
- Ready to Print on the Display
- Press the DOWN Arrow to gain Access to the Functions
- Choose Option 1)CONFIGURATION > Press Enter
- Choose Option 5)SYSTEM > Press Enter
- Choose Option 1)SERIAL NUMBER > Press Enter.
This will give you the SN/ password for you 9541WT.. .. the letters will be Lower Case when entering the for the Password.
OKI pro9541WT Toner Drum ID Sensor Cleaning
OKI pro9541WT Manual Drum Cleaning
Programming Hotronix FusionIQ Presets
This video was originally recorded specifically for use with white toner printing systems, but the programming instructions are the same for any application.
Environmental Conditions and White Toner Printing
Print Optimizer Dongle Install – 9541
At the end of this lesson, the learner will be able to:
- Insert the dongle into a USB port on their computer.
- Locate the zipped file on the ColDesi Support website.
- Download and extract the contents of the zipped folder to install the software.
- Navigate through the process of installing the software.
- Navigate through the process of setting up the software once it has been downloaded.
- Choose the 9541 printer under the Queue Manager menu.
Print Optimizer -9541 Keyless Installation
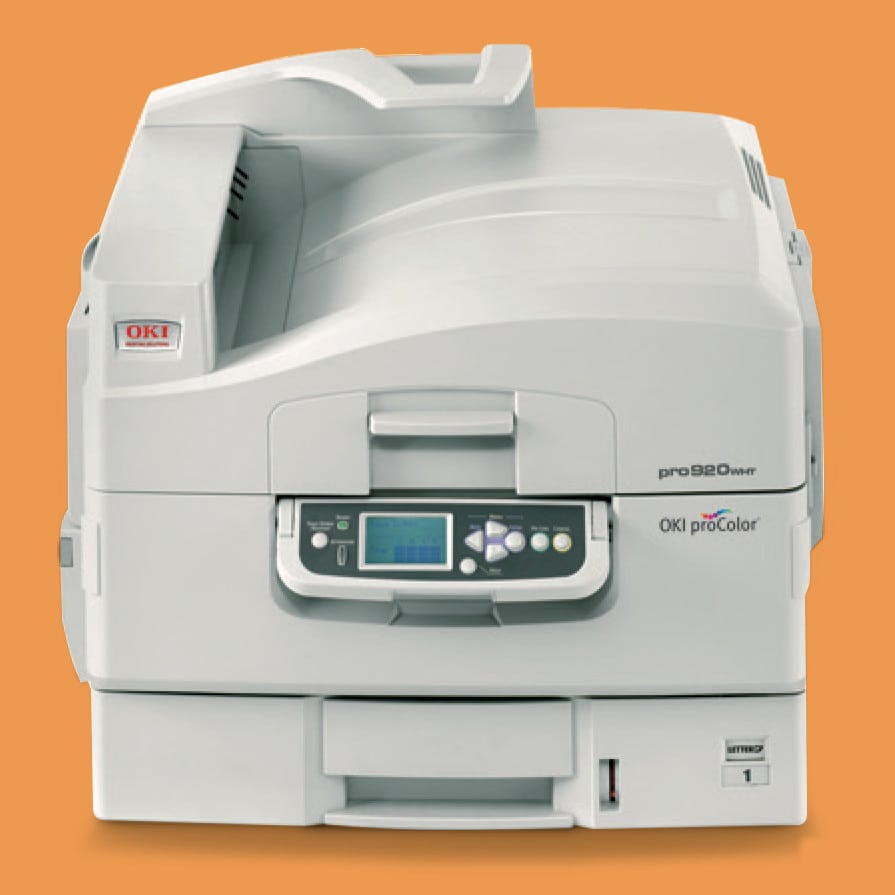
OKI 920WT Support
OKI 920WT Most Frequently Asked Questions
And here are our most common requested tips, tricks, maintenance instructions and more. Right now these are a great place to learn more about owning and operating the DigitalHeat FX pro920WT – watch for more models coming soon!
Frequently Asked Questions
How do I register my Printer?
You’ll need to register your printer with OKI in order to get direct support. Follow these steps.
Go to this link. Select “Color Page Printer” under Technology and “pro920WT” under Model. The serial number is located on a white sticker on the back of the printer.
Where do I find the correct driver?
What do I do if my Printer is recognized as a USB Device INSTEAD of a Printer?
Turn printer off. Under “Devices and Printers” right click on the device and select “Remove Device”. Turn printer on and wait for it to initialize. The printer should pop up under the Printers category after a few minutes. If problem persists, call the OKI Pro Color Hotline at 855.654.6777 for assistance.
What are the correct print settings on my computer?
Paper Size: Tabloid; Media Type: Transparency; Quality: Fine Detail (600 x 1200) or Photo (Multi-Level); Output Bin: Stacker Face Up; Print Mode: White On
What are the correct “color darkness” settings?
Cyan = 0, Magenta = +2, Yellow = +1, White =-3. Using the arrows on the control panel, go down to “Calibration” and hit Enter. Arrow down to desired color darkness and hit enter. Use the up or down arrow to enter the correct number and hit enter.
What is the factory reset password?
The “Admin Setup” menu will require a password. The factory set password is aaaaaa. Hit the up arrow and enter once to input one “a”. Repeat five times and hit enter again.
How do I set the IP address for the Printer?
Amin Setup -> Network Setup -> IP Address Set -> Manual -> Enter
How do I print a Raster/Bitmap image with a transparent background?
CorelDraw: Import the file and print. Illustrator: Open Illustrator files in Photoshop and use following procedure.
In Photoshop:
- Open your file
- Click the background area of the image using the Magic Wand tool
- Go to Selectand choose Inverse
- Go to the Pathswindow. Click on the Paths Arrowand then Make Work Path
- Input the value of Toleranceto 0.5
- Click on the Paths Arrow and choose Save Path
- Click OK to save Working Path as Path 1
- Click on the Paths Arrow and click on Clipping Path
- Click OK to select Path 1 as Clipping Path and save your file
- Click on Print
Which side of the “A” film goes up in the MPTray?
The matte/coated side gets installed in the MPTray facing up, with the shiny side down.
How do I clear a “Tray 1 Empty” error?
Install regular copy paper in Tray 1 to clear error. This clears the error and can be used for periodic cleaning cycles.
When do I run a cleaning cycle and how do I do that?
Cleaning cycles should be run using regular 8.5″x 11″ copy paper if smudging or random flecks of toner appear on printed sheets and if any different media is used that fails to print correctly. On the printer control panel go to Print Information -> Demo Page -> Cleaning Page -> Execute. Repeat until all sheets in the cleaning cycle come out clean on both sides.
Why is my printer not printing?
If the printer control panel says:
Change Paper in MPTray
Tabloid
Transparency
Then you should press the ONLINE button to print
To disable this Media Check feature so it won’t happen again, turn it off in Printing Preferences.
If the printer control panel says:
Ready to Print
Then the IP address may have changed when power it off. See “How do I set the IP Address on my printer?” to set manually.